How to Install WPC Interlocking Tiles on an Uneven Balcony

Time:2026-09-28 Author:Madeline
0%

How to install WPC interlocking tiles on an uneven balcony starts with checking the surface, not opening the tile boxes. Look for loose concrete, standing water, sharp height changes, and blocked drains. A balcony can appear nearly flat while still holding rain beneath a mat. Small details matter. The tiles need a firm, stable base and enough clearance for water to escape.

For this guide, composite-decking specialist Alex Morgan is an illustrative expert voice, not a real-world source. His practical reminder is: “Interlocking tiles can follow minor surface variation, but they cannot fix a weak or poorly draining balcony.” Treat that distinction seriously. Measure the floor with a straightedge, note dips, and check the balcony door clearance before buying materials. If the surface has severe slope, cracks, or persistent pooling, seek an on-site assessment rather than hiding the problem beneath tiles.

The sections ahead cover surface inspection, measuring, careful leveling, tile layout, cutting, and final checks. You’ll learn when compatible leveling pads may help and when they could obstruct drainage or create an unstable edge. Keep the manufacturer’s installation instructions close; tile systems differ. Work slowly around corners and drains. Test the fit before locking every tile together. A tidy finish is useful, but a dry, stable surface matters more. One honest limitation: no single method suits every balcony, so verify the floor conditions before installation.
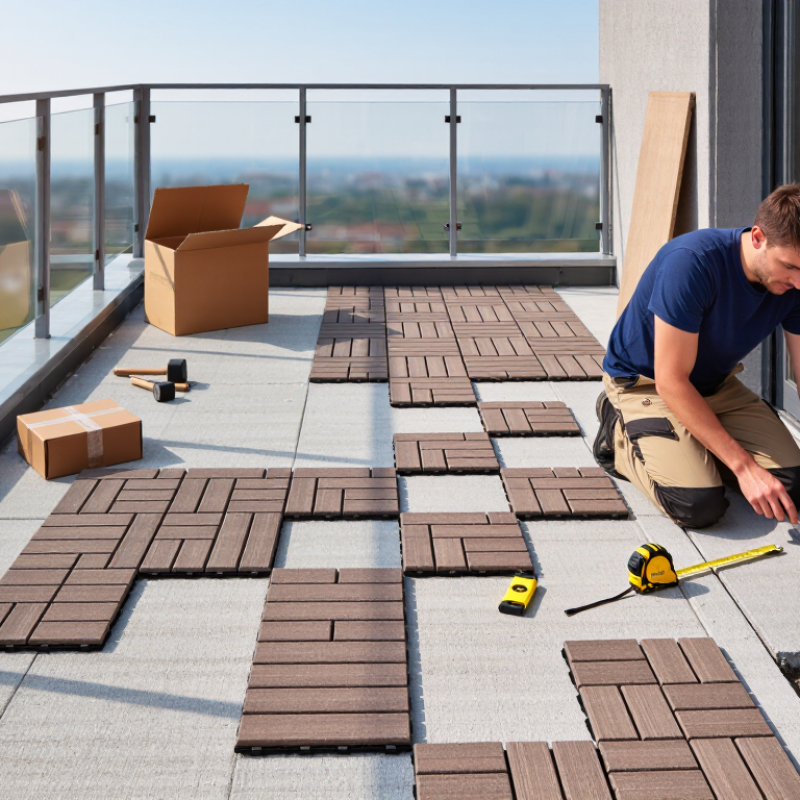
How to Install WPC Interlocking Tiles on an Uneven Balcony

Assess the Balcony’s Unevenness, Drainage, and Load Capacity

Before laying WPC interlocking tiles, map the balcony’s high and low spots. Place a straightedge across the surface and note gaps, rocking, and puddles after rain. Small dips matter. A tile grid can follow the slope, but it cannot correct a failing substrate. Check for loose concrete, cracked waterproofing, rust stains, or water entering the room. These signs call for a qualified building professional, not a thicker layer of tiles.

Drainage and load capacity deserve equal attention. The Tile Council of North America’s exterior tile guidance commonly uses a drainage slope of about 1/4 inch per foot (roughly 2%). Confirm that water can reach the drain without collecting beneath the tiles. For context, the 2021 International Building Code, Table 1607.1, sets balcony live load at 1.5 times the load for the area served. Local codes and building conditions vary; this figure is not a DIY load limit. Add the tile system’s stated weight to planters, furniture, and people, and ask an engineer if capacity is uncertain.

Tips: Check drain grates before and after a dry-fit. Keep joints open as the tile instructions specify, and avoid blocking door thresholds. A small puddle can reveal a slope problem, though one test may not show how the balcony drains in heavy rain. Don’t guess at structural capacity.

How to Install WPC Interlocking Tiles on an Uneven Balcony

Assess the balcony’s unevenness, drainage, and load capacity before installation.

Example survey readings: surface-height differences measured from a reference plane at six points. These illustrative values are not installation tolerances; measure your own balcony and follow the tile system’s instructions. Check that water can drain freely, and confirm the balcony’s allowable load from building documentation or a qualified professional—surface measurements alone cannot establish structural capacity.

Clean the Surface and Repair Loose or Damaged Areas

Before laying WPC interlocking tiles, clear the balcony and inspect the floor in daylight. Brush away grit, leaves, and loose coating, then wash greasy marks with mild detergent and water. Use a stiff nylon brush rather than a metal scraper that could gouge the surface. Rinse carefully, guiding water toward the drain. Let it dry.

Check for rocking slabs, hollow-sounding patches, flaking paint, and cracks that collect water. Press loose edges and mark them with chalk so you can find each repair after cleaning. Remove only material that is already detached, and follow the repair compound’s instructions. A patch may feel dry on top while remaining soft underneath. Wait longer if needed.

Small chips can often be filled with a suitable exterior repair compound. Widening cracks or repeated movement need professional assessment before you cover them. Do not use tiles to conceal a shifting slab or persistent standing water; trapped moisture can make the surface less stable. Once repairs have cured, sweep again and test drainage with a small pour of water. A slight dip may remain; notice it rather than assuming the base is perfectly level. Tiles can tolerate minor variation, not a loose foundation.

Create a Stable, Level Base Without Blocking Drainage

Before laying WPC interlocking tiles, sweep the balcony and check for loose grit, cracked areas, and blocked drain outlets. Use a straightedge to find dips and raised edges. Small changes can make a tile rock. A little rocking matters.

The goal is a firm, even support surface, not a perfectly flat balcony. Most balconies need a slight fall toward the drain so rainwater can escape. Keep that slope intact. If the tiles sit directly on the surface, confirm that water can still pass through their gaps and reach the outlet. For larger uneven spots, use stable, exterior-rated leveling supports only if they are compatible with the tile system. Avoid loose scraps or soft wedges; they can shift underfoot.

Dry-fit a few tiles and press each corner before connecting a full row. Check that edges meet cleanly and that no tile bridges a hollow. It is tempting to hide a low spot beneath more flooring, but trapped water and movement may cause trouble later. Do not cover drains or make changes to a waterproofing layer. If the surface has deep dips, standing water, or damaged coating, pause and ask a qualified installer to assess it. A careful test now can prevent a wobbly finish.

How to Install WPC Interlocking Tiles on an Uneven Balcony - Create a Stable, Level Base Without Blocking Drainage

Stage What to Check Method or Tool Practical Target Recommended Action Drainage Protection
1. Inspect Look for loose concrete, cracks, damaged waterproofing, or persistent standing water. Visual inspection after rain; check the balcony surface and drain. The substrate should be sound, clean, and free of active leaks. Repair surface or drainage problems before laying tiles; consult a qualified professional if the membrane or structure appears damaged. Keep the drain and any overflow openings clear and accessible.
2. Map uneven areas Find high spots, dips, and changes in slope across the installation area. Use a straightedge and spirit level; mark low areas with removable tape. Record the largest gap beneath the straightedge and the direction of water flow. Plan the support layout around the measured irregularities rather than assuming the floor is level. Do not use a level surface as a reason to remove the balcony’s designed fall toward the drain.
3. Confirm the fall Check that the existing surface directs water toward its outlet. Measure with a level or straightedge and check water movement where safe and appropriate. Many exterior surfaces are designed with a fall of about 1–2% (10–20 mm per metre), but the required slope depends on the building and local requirements. Follow the balcony design and local requirements; do not create a reverse slope or a water-trapping low spot. Preserve the existing drainage route beneath and around the tile surface.
4. Choose supports Select a stable way to accommodate small variations without damaging the substrate. Check tile and support instructions for outdoor use, load limits, and permitted adjustment. Supports must sit firmly and remain compatible with the tile system and balcony surface. Use only suitable, stable exterior-rated supports where the system permits them. Avoid loose scraps, compressible packing, or improvised stacks. Keep support placement from forming a continuous barrier across water pathways.
5. Protect the membrane Confirm that installation will not puncture or abrade the waterproofing layer. Review balcony and tile-system instructions; check with the property manager if required. No unapproved drilling, fixing, or sharp-edged contact with the waterproofing. Use a compatible protective layer only if permitted; do not fasten through the membrane without approved details. Avoid coverings that seal the surface or block water from reaching the drain.
6. Dry-fit tiles Check the layout, interlocking edges, boundary cuts, and access to drainage points. Lay out a small test section before connecting the full floor. Tiles should connect fully and sit without rocking under normal foot pressure. Adjust permitted supports or revise the layout; follow the tile maker’s expansion and edge-clearance guidance. Leave the drain visible and removable access to it unobstructed.
7. Install and trim Maintain secure connections and avoid forcing tiles against walls, posts, or railings. Work row by row; use a suitable saw and eye protection for cuts. Cut edges should be stable, with no loose pieces or sharp projections. Follow the product’s cutting and edge-finishing instructions; keep offcuts and debris out of the drain. Do not add edging or trim that creates a dam across the drainage path.
8. Final check Walk the surface carefully and inspect water flow and drain access. Check for rocking, loose connections, trapped debris, and visible pooling after rainfall. The floor should feel stable while the drainage outlet remains reachable and functional. Lift and reposition affected tiles or supports if movement or water trapping is found; recheck periodically. Keep a clear route for water and clean the drain regularly.

Note: Balcony construction, waterproofing systems, tile designs, and local requirements vary. Follow the applicable installation instructions and building guidance.

Arrange and Interlock the WPC Tiles Across the Balcony

Lay the WPC tiles across the balcony before locking any edges. Sweep away grit, then mark the direction of the drainage fall so the finished surface does not trap water. Start at a straight wall or doorway, but leave the perimeter clearance specified for your tile system. Dry-fit first. Stagger joints where the design allows, and check each row with a straightedge. On an uneven balcony, a tile may rock over a shallow dip; forcing its tabs together will not correct the base.

Connect the corners with firm, even pressure, listening for each joint to seat. Keep checking the rows against your starting line, since a small drift can become obvious at the far edge. Trim perimeter pieces only after measuring twice, and keep cut edges clear of drains. I may be overcautious here, but a neat-looking interlock can hide a poor fit underneath. Lift a few tiles and inspect for grit, rocking, or blocked drainage before finishing.

Use published test information carefully. ASTM D7032 sets a performance-rating framework for WPC and plastic lumber decking boards, including load-related evaluation; its ratings should not be treated as proof that every modular tile suits every balcony. Check the tile system’s own test data and installation limits, especially where the balcony has a dip or unsupported edge. Do not bridge a hollow with a tile. Fix the underlying surface or seek qualified advice.

Trim Edge Tiles and Check the Finished Surface for Stability

Once the main WPC interlocking tiles are in place, measure the balcony edges from several points. Uneven walls may leave a narrow gap at one end and a wider one at the other. Mark each edge tile individually rather than assuming the balcony is square. Remove the tile before cutting, and use eye protection with a suitable fine-toothed saw. Keep cut edges facing the wall where possible. Leave the clearance recommended by the tile instructions, since materials can expand with heat. Don’t force a tile against a drain or block water flow.

Tips: Test a scrap piece first. Measure twice. A slightly uneven cut can show more than expected.

Press each trimmed tile into its connectors, then walk slowly across the finished surface. Listen for clicks or movement, and check whether corners lift underfoot. Kneel down and inspect joints at the edges; a connector can look engaged while remaining loose. If a section rocks, lift it and check for debris, a damaged tab, or a low spot beneath the tile. WPC tiles can follow minor surface variation, but they should not be used to hide a pronounced slope or unstable balcony floor. I once missed a small wobble near a doorway; checking again in daylight made it obvious. Refit any unstable pieces before placing furniture.

FAQS

How can I check whether my balcony is uneven?

Lay a straightedge across several areas. Note gaps, rocking, and puddles after rain. Small dips matter.

Can interlocking tiles fix a sloping or damaged balcony?

No. Tiles may follow minor surface variation, but they cannot repair a failing base. Cracked waterproofing, loose concrete, rust stains, or water indoors need professional assessment.

How can I check drainage before installation?

Check whether water can reach the drain without collecting beneath the tiles. Inspect the drain grate during a dry-fit. One test may miss problems during heavy rain.

What should I consider about balcony load capacity?

Include the tiles, planters, furniture, and people when considering the total load. Don’t guess. Ask an engineer if the balcony’s capacity is uncertain.

How should I measure edge tiles?

Measure the balcony edges at several points. Mark each tile separately, since walls may not be square. I once assumed an edge was straight. It wasn’t.

What should I do before cutting an edge tile?

Remove the tile before cutting. Wear eye protection and use a suitable fine-toothed saw. Test a scrap piece first.

How much space should I leave near walls and drains?

Follow the tile instructions for clearance, allowing for heat expansion. Keep tiles away from drains and door thresholds. Don’t block water flow.

How can I tell if the finished tiles are stable?

Press each tile into its connectors, then walk slowly across the surface. Listen for clicks and check for lifted corners. Look closely at the joints.

What should I do if a tile rocks underfoot?

Lift it and check for debris, a damaged connector, or a low spot beneath it. Refit unstable tiles before adding furniture. Check again in daylight.

Conclusion

How to install WPC interlocking tiles on an uneven balcony starts with assessing the surface. Check how uneven the floor is, identify drainage paths, and make sure the balcony can support the added weight. Clear away dirt and debris, then secure or repair any loose, damaged, or unstable areas before laying the tiles.

Next, create a firm, reasonably level base while keeping drainage openings and water flow unobstructed. Arrange the tiles across the balcony, connecting each one securely and adjusting the layout as needed to suit the space. Cut edge tiles carefully for a neat fit, then walk over the finished surface to check for movement, rocking, or gaps. Make any necessary adjustments so the tiles sit securely and water can still drain away.

Madeline

Madeline

Madeline is a dedicated marketing professional with a wealth of expertise in our company's core offerings. With a keen understanding of the industry, she brings a unique perspective to her role, consistently delivering high-quality content that highlights the superior aspects of our products. As......